
Scenario 1: Order manufacturing
Order manufacturing Blueprint
Objective: To guide Zylker’s design and manufacturing team through their process when a new order is placed. The process can track multiple phases of review, prototype testing, packaging, and delivery.
Pre-requisites: Before building the order manufacturing orchestration, create three teams: Design, Engineering, and Manufacturing and associate users with these teams. Create a role for Head of Design.
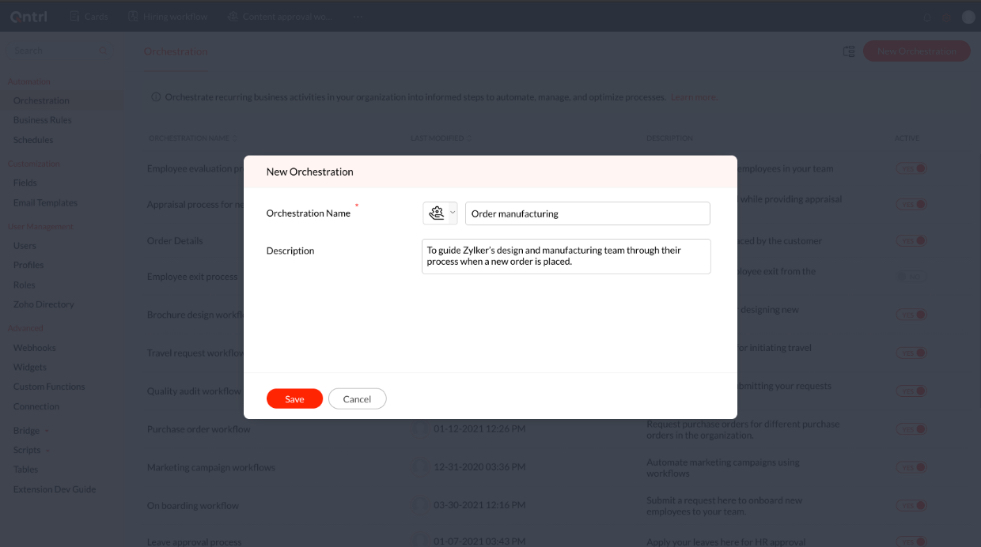
Creating an orchestration
Navigate to Settings and select Orchestration from the menu.
Click the New Orchestration button and fill in the name and description.
Step 1
The first step to initiate an orchestration is to create a form with relevant fields. Create a new section called 'Design Details' and add the following custom fields to the form:
| Field Name | Field Type | Properties |
|---|---|---|
| Order quantity | Integer | Mandatory |
| Fabric Type | Dropdown | Mandatory Options: Rayon, Linen, Cotton, Polyester |
| Design specifications | Multi-Line |
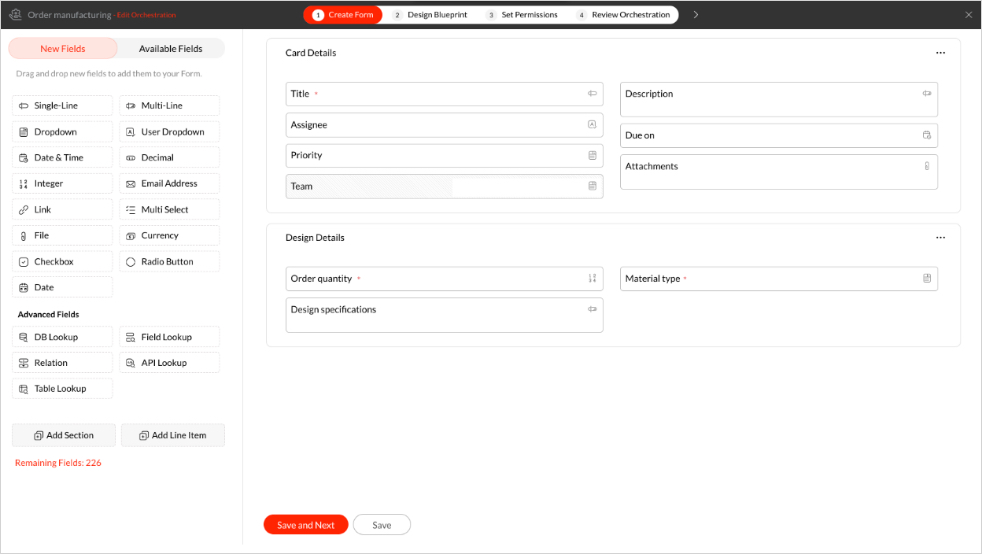
Once the fields are added and the form is ready, click Save and Next.
Step 2
Blueprint helps to design the end-to-end processes of an organization. A single orchestration can host more than one blueprint for different criteria. However, the first blueprint must be created without any criteria.
Add the following stage names in the pop-up and then click Add to Blueprint.
Initial analysis
Design in-progress
Reviewing
Design approved
Prototype testing
Forward design to manufacturing unit
Initiate packaging and delivery
Close order (Closed stage)

On adding the stages, a flowchart with pre-populated transition names is created.
Stages can also be added from the right panel of the blueprint editor. To add a new stage to this blueprint from the right panel,
Type the stage name ‘Design iteration’ in the search bar and click Add.
Now, drag and drop the stage into the blueprint editor on the left.
You can also modify the transition names to suit your workflow. Here's a list of the transitions used:
Start design process
Submit for review
Approve design
Create prototype to analyse design
Prototype successful
Manufacturing complete
Product delivered
Reject design
Re-submit for review
Prototype failure

Now that the outline of the blueprint is done, we can get into the details like setting SLAs and transition conditions.
Click on the stage name to configure the stage deadline, early reminder, day-of reminder, and escalation alert.
Click on the transition name to configure conditions before, during, and after the transition occurs.
Stages:
| Initial analysis | Stage Deadline | Send early reminder | Send day-of reminder | Send escalation alert |
| 15 days | Set time: 5 days Notify to: Assignee | Notify to: Assignee, Assignee’s line manager | Set time: 3 days Notify to: Assignee's line manager |

| Reviewing | Stage Deadline | Send early reminder | Send day-of reminder | Send escalation alert |
| 5 days | None | Notify to: Head of Design | None |
Transitions:
| Start design process | Before | During | After |
Who can perform this transition? Assignee Which Cards can pass through this transition? All Cards | None | None |
| Submit for review | Before | During | After |
Who can perform this transition? Assignee Which Cards can pass through this transition? All Cards | Add new attachment field: Attach design for review | None |

| Approve design | Before | During | After |
Who can perform this transition? Role: Head of Design Which Cards can pass through this transition? All Cards | Comments | None |
| Reject design | Before | During | After |
Who can perform this transition? Role: Head of Design Which Cards can pass through this transition? All Cards | Comments | Send email: Send rejection email to Assignee. (Add an email template for design rejection and configure an email alert to be sent to the Assignee.) |

| Re-submit for review | Before | During | After |
Who can perform this transition? Assignee Which Cards can pass through this transition? All Cards | Add existing attachment field: Attach design for review | None |
| Create prototype to analyze design | Before | During | After |
Who can perform this transition? Assignee Which Cards can pass through this transition? All Cards | None | None |
| Prototype successful | Before | During | After |
Who can perform this transition? Assignee Which Cards can pass through this transition? All Cards | None | Send email: Forward design and prototype details to manufacturing team (Add an email template to initiate manufacturing and configure an email alert to be sent to the manufacturing team.) Update fields: Team: Engineering Assignee: Steve Martin |


| Manufacturing complete | Before | During | After |
Who can perform this transition? Assignee Which Cards can pass through this transition? All Cards | Add field: Attachments | Associate custom functions: Integrate_with_logistics_application (Write a custom function to integrate with your logistics application and associate it here.) |
| Product delivered | Before | During | After |
Who can perform this transition? Assignee Which Cards can pass through this transition? All Cards | None | Configure webhooks: Notify customers (Write a webhook to notify your customers about the update and configure it here.) |
Step 3:
This step can be used to decide access for your employees. Depending on the confidentiality of the process, you can allow or restrict access.
Create Cards: Users mentioned here will be able to create Cards in this orchestration. Here, all the users in the organization can create cards.
Access Cards: Users mentioned here will have an end-to-end view of all Cards created using the Orchestration. Here, users from Manufacturing, Design, and Engineering teams can access the cards.

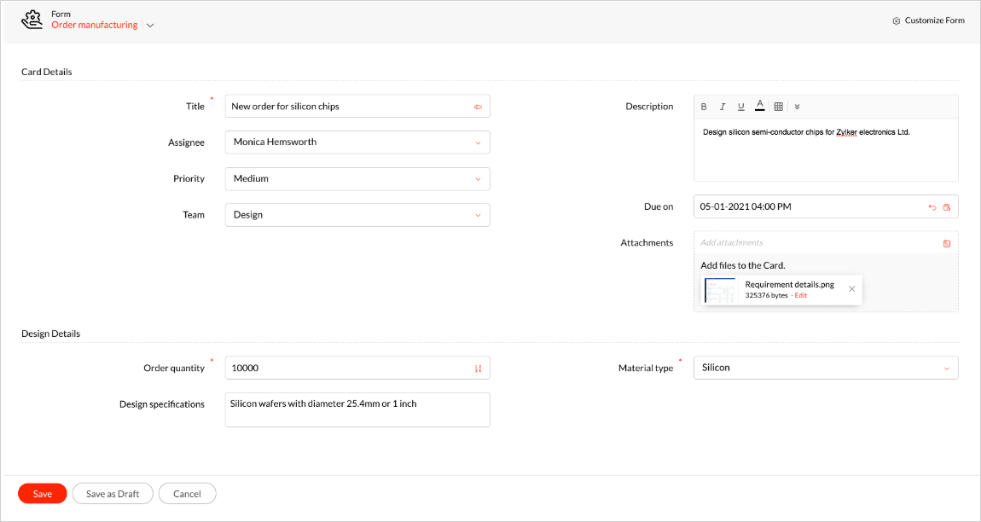
Step 4:
Once all the configurations are done, we can publish the orchestration and test its functioning by creating a card.
- Click on the New Card button.
- Fill in the details.
- Click Save.
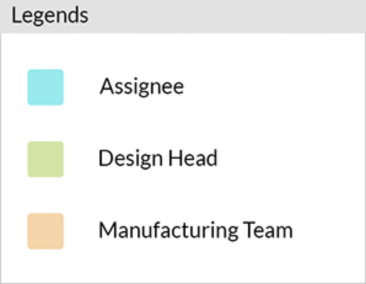
Note:
Since the job moves through different teams, we've color coded the images to differentiate the actions of each user.
Initially, the card lands in the first stage of the blueprint and the transition will be displayed as a blue button. Here, Initial analysis is the first stage.
Since we applied SLA to this stage, the card can only stay in this stage for 15 days.
On the 5th day, an early reminder email is sent to the assignee.
On the 15th day, a reminder is sent to the assignee and their line manager.
On the 18th day, an escalation email is sent to the assignee’s line manager.
To begin, click the Start design process transition button.
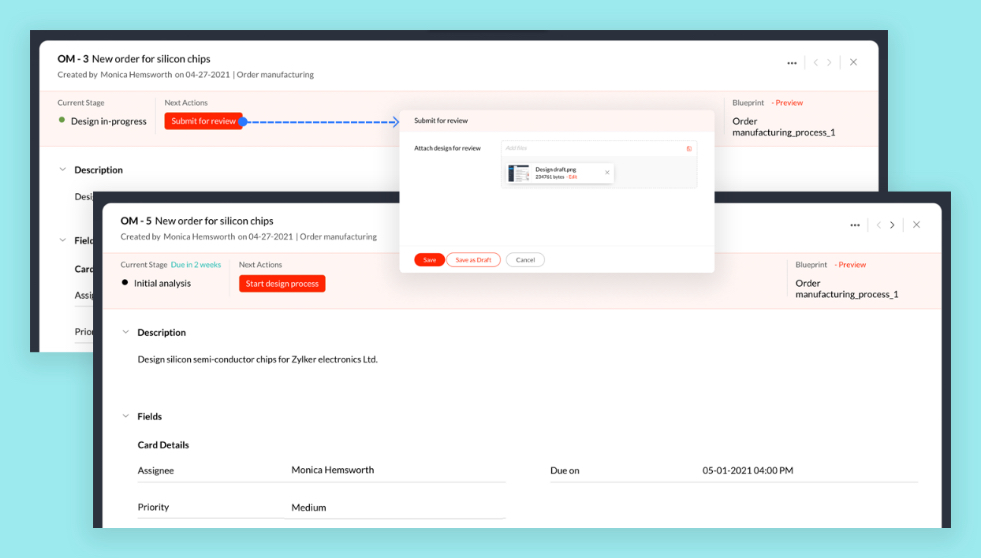
Once the design is complete, click the Submit for review button and attach the design in the Attach design for review field. On submission, the card will move to the Head of Design for approval and the blueprint will move to Reviewing stage.
Since we applied SLA to this stage, the card can only stay in this stage for 5 days.
On the 5th day, a reminder email is sent to the Head of Design.
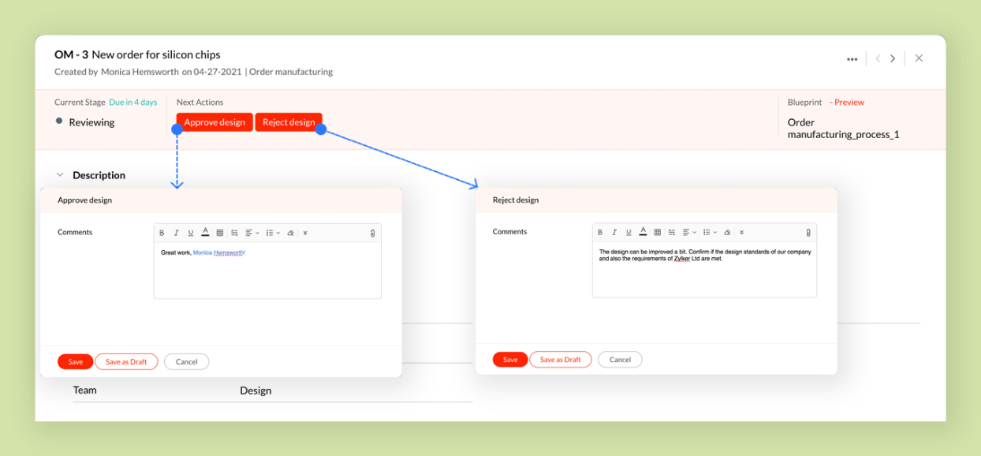
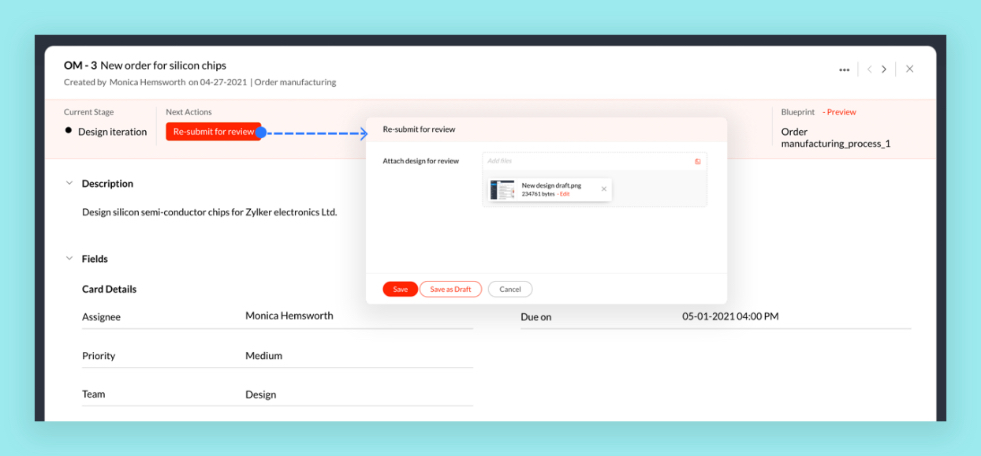
The design can be either approved or rejected. If it is approved, the card moves to the Design Approved stage. If the design is rejected, the card moves back to the assignee and a rejection email is triggered after the transition. The assignee can resubmit a new design by clicking the Re-submit for review button. Thus, the card loops between the assignee and the Head of Design until the design is approved.
After the design is approved, the card moves to the the assignee, who can create a prototype and analyze its success or failure.
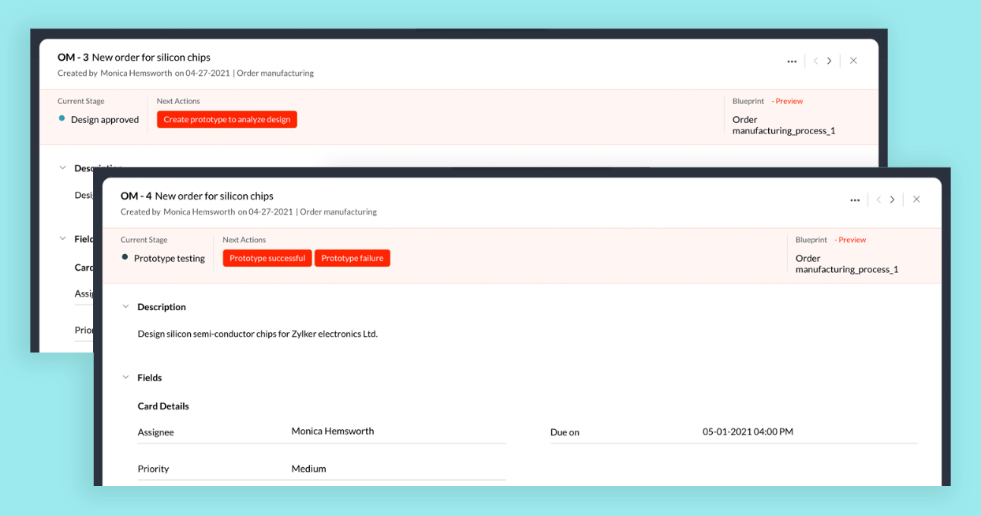
Once a successful prototype is created, the card moves to the manufacturing team and an email is triggered after the transition, forwarding the design and prototype details to the manufacturing team. The Team field is updated to Engineering Team and Assignee is updated to a user in the Engineering team.
If the prototype does not work, the card goes for another iteration of design.
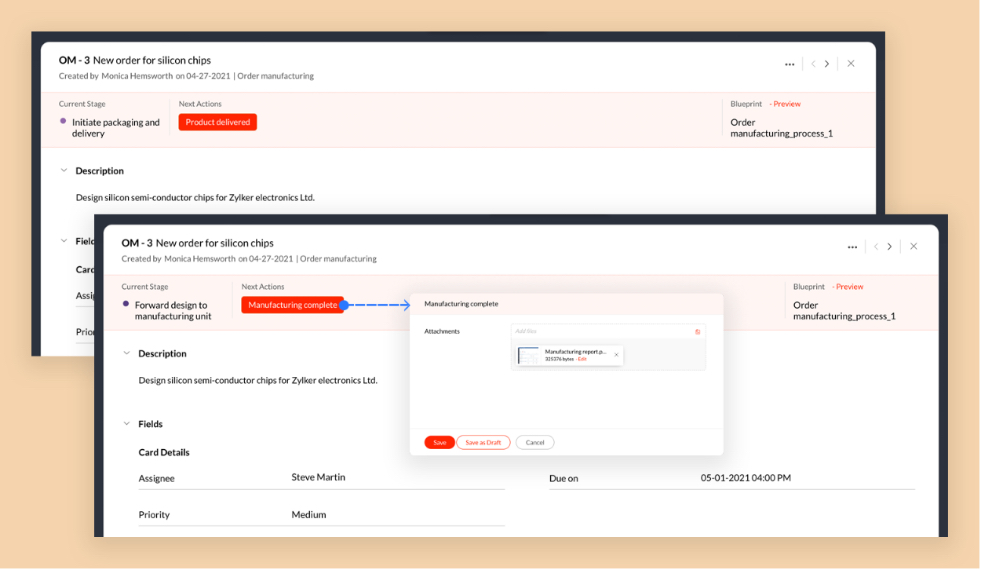
The manufacturing team will be notified when the card reaches their dock which indicates that they can start manufacturing the product. Once manufacturing is complete, a custom function is triggered to update the details in the logistics application used by the company.
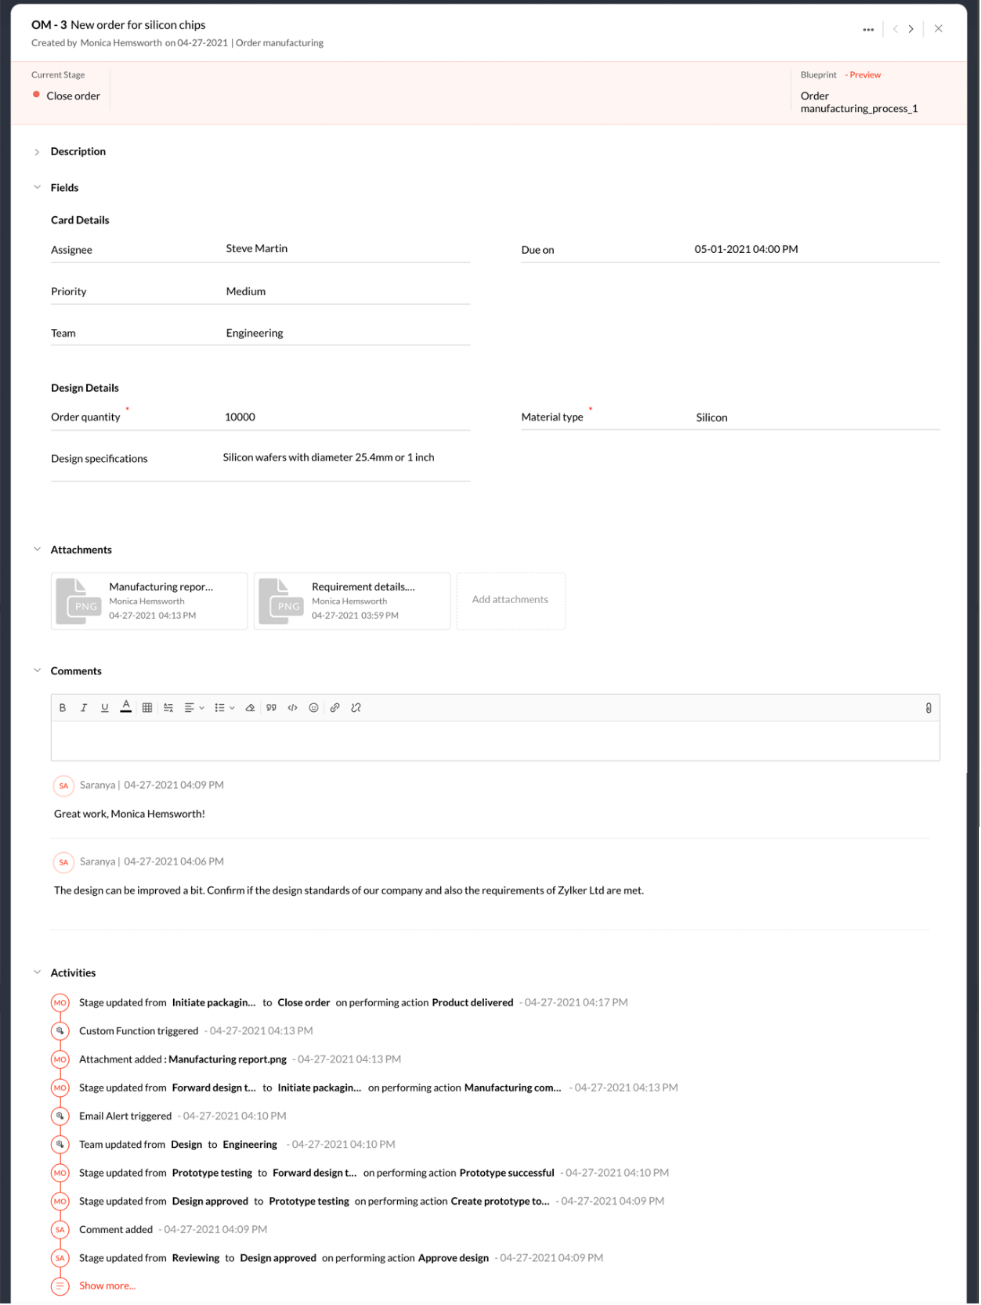
Finally, after the product is delivered to the customer, a webhook is triggered to send an SMS to the customers to acknowledge the order delivery, and then the card is closed.
The end-to-end actions performed in the card can be viewed under the Activities section.
We have successfully configured and executed the Order Manufacturing Orchestration. Let's move on to the next scenario.